


It may seem like every man and his dog now has a newsletter, but for good reason; email newsletters are one of the most effective digital marketing channels. If you’re not convinced, consider this…
Why would you want to run a newsletter?
The reason for setting up a newsletter is simple; it’s a scalable and effective method of communicating with your audience. It’s a powerful tool for spreading your message, selling your products, and staying on the tip of your audience’s tongue.
When you post a message on your Facebook page, you’re lucky if 5% of your audience sees it. When you tweet, you’re lucky if 1% of your followers are online. However, with email it’s not unusual to receive a 30-50% open rate if you know what you’re doing. On top of that, emails drive business…
Last year, 44% of email recipients made at least one purchase last year based on a promotional email. For every $1 spent on email marketing, $44.25 is the average return on email marketing investment. It’s no surprise, then, that email marketing budgets have been increasing by 10% year on year.
While these stats may inspire hope and confidence, there is a dark side to email marketing that we’d be naive not to acknowledge.
Over 84% of emails are marked as spam, which means that consumers are increasingly weary over how they filter their emails and what they sign up to. With services like Unroll.me, it’s becoming increasingly difficult to get inbox real estate, unless you truly earn it.
In this post I want to walk through how to set up a newsletter in a way that ensures that you not only dodge the spam folder, but that offers incredible value to your customers and generates a huge return on investment for your project or business.
As I wanted to make this post a really comprehensive guide for anyone starting a newsletter, i’ve broken it up into three parts, which you can skip between if you like (click the links below to skip to the most relevant part):
- How to start your email newsletter
- How to collect email addresses and build your mailing list
- How to create & send your first newsletter
How to start your email newsletter
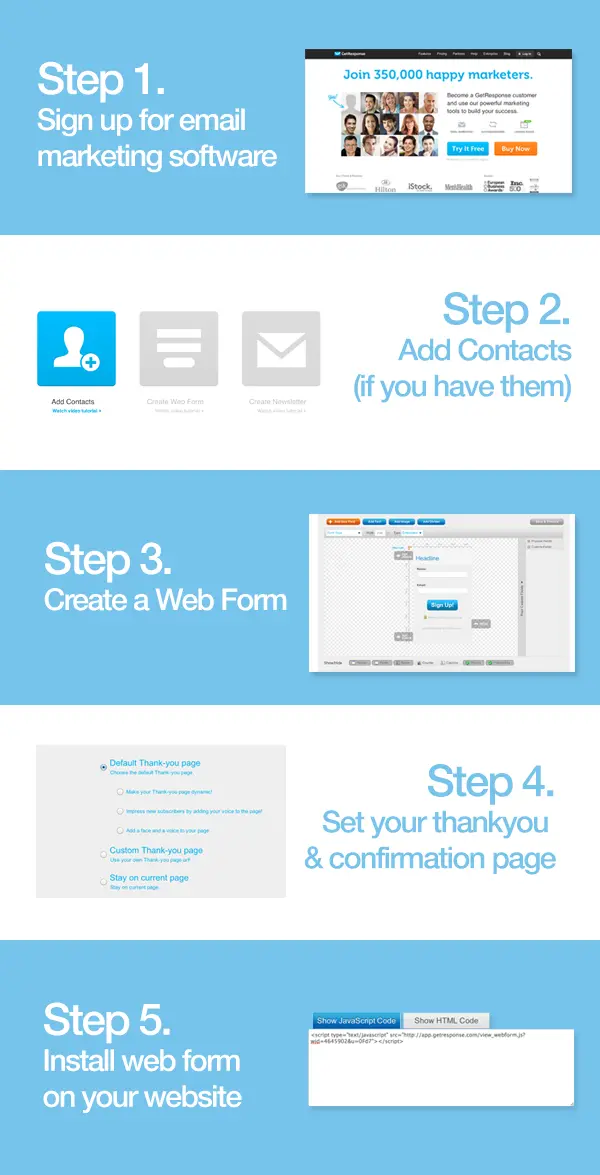
When starting a newsletter, we need to go through a few simple steps, which i’ve illustrated in the following graphic. This whole process should take less than 15 minutes when using this guide.
While these steps are all quite intuitive, I’ve talked through each one individually below in-case you’re not sure about anything.
Step 1. Sign up for an email marketing service
To begin creating a newsletter, we need a piece of software that will manage our email list, allow us to build newsletters, and provide us with the insights to see what is or isn’t working.
I recommend using GetResponse.
Over the past six years or so, I’ve played around with dozens of email marketing services, from Aweber to Infusionsoft and GetResponse. Out of all them, GetResponse is my overall favourite. Why?
It’s extremely affordable (starting at $15/month), while incredibly powerful and easy to use. I also find that GetResponse have some of the best newsletter template designs around. Aweber is another good call, but I find their user interface a bit outdated and clunky (plus, their pricing starts at $19/month - not a big deal, but considering they’re not quite as good as GetResponse IMO this pushes the needle in favour of GetResponse even more).
If you want to weigh up the different options in more detail, i’ve written a comprehensive comparison of email marketing software providers here, but to cut a long story short - GetResponse are probably your best option unless you need a complex behaviour-triggered email marketing service.
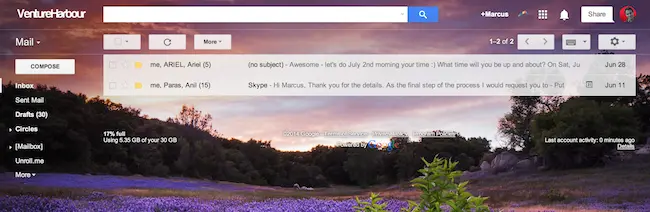
Step 2. Add your contacts
If you’re using GetResponse, the first step is to add any contacts you already have to your default list. Don’t worry if you don’t have anyone to add yet (you can just skip this step), but if you have a database of customers or readers, this is where you can add them.
From the main dashboard, click the big button that says ‘add contacts’ and you’ll be forwarded to a page that looks like this. You can then either add your existing contacts by importing them from a CSV file or copying and pasting their email addresses into the import box.
This will automatically start building your default list.
Step 3. Create a web form
The next step is to begin building our web form, which will likely be our main method of collecting new mailing list subscribers.
To do this, click the large red button that says ‘create web form’ and choose a template to begin editing from the row of default web forms.
You can then customise the web form so that it fits your website’s colour scheme and layout. Here you can also add images and extra text. Also, if you know a bit of HTML and CSS, you can hack around with the code to change how the form is displayed. However, this is not entirely necessary, as their drag and drop editor is pretty decent.
Once you’re happy with your web form, it’s time to create your thank you page. This is the page that your subscribers will see once they’ve entered your email in your web form and confirmed their email address.
Step 4. Set your thankyou page (optional)
While GetResponse does have a default thank you page that’s absolutely fine to use, I would recommend creating your own customised thank you page, either now or in the future.
Why? Well, this is a great opportunity to promote an offer to your customers or direct them to something that may be of interest on your website. It also looks a bit unprofessional leaving it as a blank page with the standard GetResponse branding.
To create your own customised thank you page, you’ll need to create a page on your website with the information that you want.
Step 5. Install your web form on your website
Once you’re happy with the way your web form and thank you page looks, it’s time to install your web form on your website.
The easiest way to do this is to just copy and paste the HTML embed code that’s provided under the ‘publish’ tab into where you want your web form to appear on your website. However, if you’re not comfortable doing this, you can always click the option ‘my web designer will install this form’, which will allow you to email a link to your code to your web designer.
Once this is done you should be able to test your web form live on your website to make sure that it’s working as it should.
And that’s all there is to it. You have the foundations of a newsletter all up and running. All that’s left to do is start building your list and begin building your newsletters.
Collecting email addresses and building your list
When it comes to creating a newsletter, getting set up is the easy bit. The real challenge is building up your mailing list of engaged recipients. So, how can we do this in a way that ensures we get the right people on our mailing list?
The first thing to realise is that people don’t sign up to mailing lists for no reason. In fact, most people actively do the opposite, which means we need to think about the following question from your audience’s perspective:
What’s in it for me?
We all visit hundreds of websites every day, and there are very few sites that don’t want us to hand over our personal information, so how can you stand out from the crowd?
By offering more value than everyone else.
That may mean writing incredible content so that people want to be updated as soon as you write a new post. It may mean having to create something like an e-book or free guide to give away in return for their email address.
There are hundreds of great blog posts written about building your mailing list, so I won’t cover this in too much depth here, but I will share a few good examples from mailing lists that I’ve subscribed to.
01Using ‘Hello Bar’ to drive subscribers
Hellobar is a powerful free widget that appears at the top of every page on your website once installed. You can customise the message and call to action, as well as A/B testing different messages to optimise your conversion rate.
For driving mailing list subscribers this is a great opportunity to attract attention with an incentive such as a free e-book or entry to win a prize in return for an email address.
02Using Pop-ups effectively
Pop ups are a controversial tactic for driving subscribers, as many people find them extremely annoying. Despite this, many marketers have found that they’re extremely effective at driving newsletter subscriptions.
If you plan to go down this route, I’d recommend using something like BounceExchange, which only triggers a pop up when a user is about to leave your website.
03Adding email captures at the end of your blog posts
One of the most common methods of building a mailing list is through blogging. We’ve written about this in more depth here, but here’s a great example of it being used in action on the KISSmetrics blog.
At the end of every post on KISSmetrics’ blog, they link to a white paper or free e-book, in which a reader must offer their email address for to download.
Creating your first newsletter
To begin building our first newsletter we’ll need to go back into GetResponse and click the green ‘create a newsletter’ button on the dashboard. That should bring you to a page that looks something like this:
From here, click on the left ‘new email creator’ button and then follow through the step-by-step editor. One of the first things you’ll need to do is decide on your subject.
How to write a subject line than stands out
Many of your recipients will receive tens or perhaps even hundreds of emails every day. Your subject line has to catch their attention and convince them that reading your email will be valuable to them. Here are a few pointers to consider:
- Keep it short - while most email clients display up to 60 characters in the subject line, many mobile browsers only show 25-30 characters. Make sure to convey what your email’s about in the first 30 characters.
- Don’t use filler words - with so few characters available, don’t waste them on words like ‘hi’, ‘hello’, or ‘thanks’.
- Be clear about the contents of the email - before trying to maximise interest and appeal, your subject line must be specific about the contents of your email. Remember, a high open rate is pointless if it annoys recipients and leads to a low engagement rate.
- Use urgency and scarcity - where relevant, it pays to use urgency and scarcity in your subject lines. For example, you might start the subject line with [Urgent] or ‘3 Days Remaining’. This conveys that they must not procrastinate on opening your email.
- Personalise it - this is the oldest trick in the book with email marketing. A subject line that includes the recipient’s name is virtually guaranteed to have a higher open rate than one that doesn’t.
- A/B Test - One of the benefits of using GetResponse is that you can split test your subject lines i.e. send 25% of your mailing list a version of your newsletter with one subject line and 25% a version with another subject line. You can then compare which subject line is more effective and send the remaining 50% of your list the best performing version.
When you’ve written a subject line that you’re happy with, you can then click next and begin choosing your newsletter template. After choosing one that you like the look of you’ll end up in the newsletter designer window, which looks something like this.
Using the drag and drop editor, you should be able to easily customise your newsletter so that it fits with the branding and design of your business. Once you’ve designed your first newsletter and have written what you want to say, it’s time to send it out to your list!
And that’s all there is to it! From here, you should find time every month or perhaps every two weeks to create a newsletter to send out to your followers. Each time, you will hopefully have more subscribers to send your newsletter out to.
In summary
Starting a newsletter and building up your mailing list can be incredibly rewarding when done right, so stick with it. As with many great things, it will take time.
However, to maximise your chances of seeing great results, constantly experiment with what works and keep improving all aspects of your email marketing.
I hope the recommendations in this post have been useful. I’m aware that we’ve tried to cover a huge range of things in one post, so don’t be discouraged if it seems overwhelming! At the end of the day, it all comes down to building your list and writing a newsletter that your audience enjoys.
If you have any questions about starting an email newsletter, building a mailing list, or anything email marketing related, feel free to post them in the comments below and i’ll be sure to respond.
FAQ
What’s the fastest way to build an email list from scratch?
The fastest way to build an email list is to offer a valuable lead magnet — such as a free guide, template, or checklist — that solves a specific problem for your target audience. This incentivises people to exchange their email address immediately, rather than waiting for them to subscribe based on newsletter content alone. Combined with strategic promotion across your website and social channels, you can accumulate hundreds of subscribers within weeks.
How many subscribers do you need for a successful mailing list?
You don’t need a large subscriber count to have a successful mailing list; even 100 engaged subscribers can generate meaningful results if they’re genuinely interested in your content. The quality of your subscribers matters far more than quantity — a list of 1,000 people who actively open and click your emails will outperform 10,000 disengaged subscribers. Focus on attracting the right people rather than chasing vanity numbers.
What’s the best platform to create a mailing list?
Email service providers like Mailchimp, Kit, or ActiveCampaign are purpose-built platforms that make it simple to create, manage, and automate your mailing list without technical knowledge. These tools handle list segmentation, automation workflows, and detailed analytics — features that would be difficult or impossible to replicate with standard email or spreadsheets. Choose one based on your budget, subscriber count, and automation needs.
How do you collect email addresses for a mailing list?
The primary method is to use signup forms on your website that appear on your homepage, blog posts, or dedicated landing pages — ideally paired with an incentive like a free resource. You can also collect emails through social media promotions, webinars, in-person events, or partnerships with complementary businesses. The key is making it easy for interested people to find and complete your signup form.
Is it legal to buy an email mailing list?
Buying pre-made email lists is generally not recommended and can damage your sender reputation, as purchased lists have high unsubscribe and spam complaint rates. More importantly, many jurisdictions require explicit consent before sending marketing emails — purchased lists often violate regulations like GDPR and CAN-SPAM. Building your own list organically ensures compliance and attracts genuinely interested subscribers.
How often should you send emails to your mailing list?
The optimal frequency depends on your audience and content, but weekly or bi-weekly newsletters tend to work well for most businesses as they maintain engagement without causing fatigue. Monitor your open rates and unsubscribe rates to find your audience’s preference — some niches respond better to daily updates whilst others prefer monthly digests. Consistency matters more than frequency; pick a schedule you can sustain.
What should you include in your first newsletter email?
Your first newsletter should set clear expectations about what subscribers will receive and establish your unique voice or perspective. Include a brief welcome message, explain your sending frequency, and deliver immediate value with useful content or resources. This first impression determines whether new subscribers stay engaged or unsubscribe, so make it count.
How do you grow a mailing list beyond your website?
You can grow your list by leveraging social media, guest posting on relevant blogs, and collaborating with complementary creators who can promote your newsletter to their audiences. Webinars, podcasts, and online communities are also effective channels for reaching new potential subscribers outside your existing website traffic. Each channel should include a clear call-to-action directing people to your signup form.